Home
Please help support us Tell friends and colleagues about our apps!
Hip Roof Framing Calculator - With Rafter Angle Cutting Templates and Layout Plans - Inch
Rafter Join Detail
|
|
With a square roof, the Ridge becomes a square center piece (kingpost) with side lengths equal to Common Rafter thickness.
To remove this center ridge piece, you can lengthen 2 (only) opposing Common Rafters by and butt their tops together in the center.
|
|
For a good straight fascia, add an extra inch or 2 to the tails of all your rafters (total length).
After they're up, you can snap a line to mark and trim the tails in a nice straight line, to make up for any ridge warp or marking, cutting and fixing errors.
The 2 end King Common Rafters are slightly different length to other Commons because the Ridge and Rafter thickness are not the same.
If the Ridge and Common Rafter thickness are identical, the 2 end King Common Rafters are the same as all Commons.
Use rafter template for end King Commons and adjust length and birds-mouth cut to suit.
Running Batten set-out points up Commons: (from lower end of rafter up - to of each batten) Mark out
Running Batten set-out points up Hip: (from lower end of hip center up - to of each batten) Mark out
Batten Lengths (long side of batten - to center of hips)
Mark, cut (and test fit) 1 Common and 1 Hip, then use as patterns to mark and cut the rest.
Lay Device on incline and hit
Start Measuring to directly measure Pitch.
Hit
Stop + Calculate to capture current Pitch Angle and calculate roof.
Hit
Speech to continuously speak measured angle.
Left click, release then drag to measure at scale in diagram below - Enlarge scale for more accurate measurements.
Roof Angle
Overhang
Scale
|
|
|
 To mark and cut hip plumb and side cuts with a circular saw
 -
Print a Paper Template (easy + accurate)
OR:
1: Mark the end plumb cut angle line
(
back from square) on both sides of the hip. This is the pointy end. (Don't cut yet)
2: Measure back
from this line and mark a second, parallel line on both sides of the hip. (This is the line to cut along)
3: Set circular saw blade tilt angle to
45°, cut 1 side along second line, with blade tilted toward pointy end, then flip and cut other side the same.
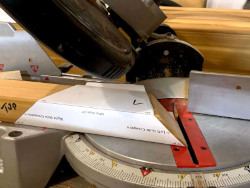
Click diagrams below to Print and cut full scale paper templates - fold over wood to mark and cut angles (easy)
|
|
|
|
|
Ply Sheathing Angle and Cut Set-back
Both sheet orientations ↔ ↕
1138.93 ft² = 35.6 Sheets +
waste = 40 Sheets
Sheets rounded up to next full sheet
Sheathing Hip Cut Calculator
|
|
For hip roof porch extensions from an existing building wall, you can use half the calculator results.
Enter the extension wall length into 'Wall Length' and
double the extension wall width, then
minus ridge thickness,
into the 'Wall Width' entries.
(minus ridge thickness to allow for ridge becoming pole plate - roof peak will be slightly higher - Ridge Thick must be same as Common).
The resulting roof diagram is then 'cut in half' along the
ridge top line, with bottom half being the roof extension,
with the ridge and 2 end (King) common rafters becoming Pole Plates that attach to the existing building wall.
①
Top ↑
The roof extension length must be at least twice as long as its width, or the 2 hips will meet before they reach the existing building wall.
If the extension length is half the extension length, the 2 hips will meet at the existing wall, and the roof will come to a peak
(with no ridge), like half a pyramid. ②
If the extension length is less than twice the width, the 2 hips will meet before they reach the existing wall, and you'll need a ridge extending from the
existing wall at 90° to join the hips where they meet. In this case, you can enter the extension wall length into the 'Wall Width'
and double the extension wall width into 'Wall Length', then 'cut the diagram in half' length-ways at the center.
(move or add 2 commons to become pole plates at existing wall) ③
Example of projects completed using this calculator


|
I built this size 104.5 ft² to keep within 105 ft² which is the maximum outdoor structure size I could build in Calgary AB without a permit.
Cutting measurements and angles were perfect.
I pre-cut and stained all pieces and then put it together myself without help or assistance.
A little tricky - multiple ladders helped.
I had 4 steel corner brackets custom made and powder coated.
Thank you.
Tim
|

|

|
Adjust scale of diagrams to measure 100% scale on screen with a ruler.
Scale


